Showing posts with label Breakfast. Show all posts

Friday, July 30, 2010

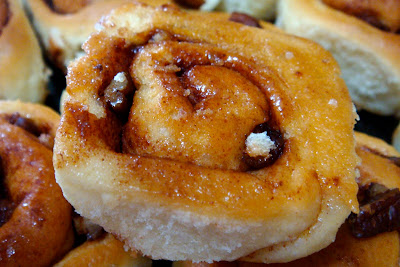
Cinnamon Buns

Just baked these cinnamon buns, preparing them for the family gathering for tea on Sunday :)
This is the 3rd time I'm baking them in 2 weeks. I know the children love them.


Recipe for Cinnamon Buns
(makes 12)
Ingredients:
(A)
125g warm milk (I used warm water instead)
50g sugar
5g dry active yeast
(B)
1 egg, room temperature
35g melted butter
(C) Sift
300g bread flour 
(D) Mix
40g melted butter
60g brown sugar
6g ground cinnamon
chopped pecan nuts (optional)
Method:
1) Dissolve sugar in warm milk/water. Stir in the yeast. Let the mixture stand for 10mins, or till it is foamy.
2) Stir in (B). Add flour. Use dough hooks of beater and mix well till dough ball is formed.
3) Turn out the dough onto a floured surface and give it another good knead for another 5-10 minutes. Add a little more flour as necessary to prevent sticking.
4) Heat oven to 100 degrees & switch off. Place dough in a greased glass bowl. Cover bowl with a moist towel and leave in oven for 1hr or till dough has doubled.
5) Roll dough flat. Trim dough into a rectangular shape. (The trimmed off dough can make another 2-3 buns)
Spread the cinnamon-sugar-butter (D) over the dough and sprinkle chopped pecan nuts all over. 
6) Roll up dough & cut into small pieces. Place rolls on greased pan, leaving space for expansion. Cover & let the dough rise for 30 mins, or double.
7) Bake at 200 degrees in pre-heat oven for 15 mins or till golden brown.
8) Enjoy your cinnamon buns hot & soft. To keep, let them cool & put in air-tight container & keep in the fridge. Just need to reheat before serving.
Enjoy!

Thursday, July 15, 2010

Sunny Pancakes

Prepared pancakes for breakfast this morning.

Sunny, Soft & Fluffy Pancakes :)


Monday, November 9, 2009

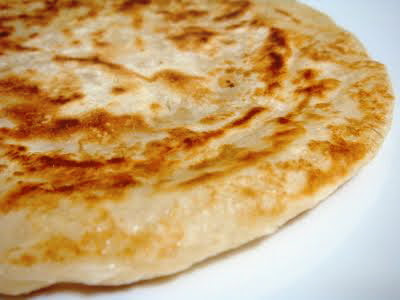
Roti Prata

Just pan fried some prata for breakfast this morning & served them with just some sugar. Well, I didn't make the prata from scratch. I just used a ready-made prata & I just need to pan fry or bake it. I always panfry them in a pan over a gentle heat & flip the prata occasionally so that the prata will be crispy & fluffy, just the way we like them.

I just grease the pan first & I don't add anymore oil. So this is definitely a healtier choice. To keep the pratas warm & crispy, I would keep them spread out in the oven with a low heat. When they're all done, just serve with your favourite curry or just some sugar :) They're better than many pratas served  in the average prata stall in the neighbourhood.


Roti Prata, Crispy Pancake... Can't wait to eat it...


Crispy & Fluffy Roti Prata... Can't get enough of them...


A Family Pack of Frozen Roti Prata
 I always have a pack in the fridge...


A piece of frozen Roti Prata Dough

Thursday, October 29, 2009

Fluffy Pancakes

Found this "Fluffy Pancake" recipe from Rei's Blog "All That Matters" and had used it for a few times already. The recipe requires the separation of egg yolks and egg whites. And you'll get fluffy pancakes, better than Macdonalds :P No more pancake mixes for me!

The first time I attempted the pancake recipe, I tried to cheat by skipping the egg separation step & beat the eggs together with everything else. The pancakes ended up okay but not as fluffy as I would have liked. And according to Rei, the pancakes ahould be fluffy, like those served at Macdonalds. I had no prior success in separating eggs before & I gave up the recipe, hoping to look for another one that uses the whole egg method. It was only after I've picked up the skill of separating the egg that I decided to try the recipe again. And this time, it worked! The pancakes were great!

The Tricky Business of Separating Egg Whites & Egg Yolks
At first I tried those plastic 'egg sieve' that supposedly helps to do the task. But it just didn't work for me. The egg white tends to stick to the yolk. And when I tried shaking the egg whites off, the entire yolk dropped into the bowl! I almost gave up, thinking that the skill must be for master chefs & very experienced cooks. Then I read a book that actually shows & explain how this should be done. So I plucked up the courage & tried again. Of course, there were minor accidents along the way... like being violent enough to break the egg yolk together with the shell... I didn't know I was that strong!
If you're wondering how exactly, watch this  youtube video on egg separation.


Fluffy Pancakes

Adapted Recipe for Fluffy Pancakes
(Makes 8 medium size pancakes, using 1/4 cup to pour the batter)

Ingredients:
(A) Mix together in a mixing bowl
100g self raising flour, sifted
a pinch of salt

(B) Mix well in a mesauring cup
80ml milk
2 egg yolks
1 tbsp vegetable oil
1/2 tsp vanilla essence

(C)
2 egg whites
2 tbsp fine sugar

Method:
1) Make a well in the centre of (A) the flour & salt in the mixing bowl.
Pour in (B) & mix the mixture to a smooth batter using a hand whisk.
2) Whisk the egg whites in a grease-free bowl using electric whisk till foamy.
Add sugar gradually & continue to whisk till stiff.
3) Stir in 1/4 of egg white to the batter to lighten it folding mixing in the rest of the egg white.
4) Heat a lightly greased frying pan (or just use a non-stick pan) and pour batter.
(I use a 1/4 cup to scoop & pour the batter at 1 go to achieve a nice circle & the pancake will be evenly browned. If you use a tbsp and make a few scoops, the cooked pancake will not be a nice circle & will appear to have 'rings' with the centre ring being the darkest.)
5) Flip the pancake over once you see bubbles appear on the surface. Brown the other side & remove from heat. (There is no need to add oil to the pan as there is already oil in the pancake batter.)
6) To keep the pancakes warm (while cooking the rest) before serving, keep them in the oven with low heat turned on.
7) Enjoy your fluffy pancakes hot with some butter & golden syrup. :)

Wednesday, October 21, 2009

Cinnamon Buns Again


Cinnamon Buns
More kneading, more sugar, more cinnamon, more sinful...

My 3rd attempt making cinnamon buns & 2nd successful one. Hooray! Memories of my 1st failure was always at the back of my mind & I was keeping my fingers crossed up till the moment I bite into the cotton soft buns. The 1st time I made the cinnamon buns, they were kind of tough, solid like a rock. Jerome said I could kill with them. I've also changed a different brand of yeast. The old one I was using has a very sour smell. I kneaded the dough by hands a little after the mixer worked on it, giving it a good massage. I added more sugar & cinnamon powder. The results are great! The cinnamon buns are the best that I've made so far! Now, they're to die for... Well.... At least that's according to me :P


Fresh out of the oven, looking a little 'undone'...


Buns turned out from the pan....
Ooooo.... Look at all the goodness....
Enough sin... Don't have to cover them with frosting.... and sin further...


Cotton Soft ... Just the way I love my bread...

For recipe, please refer to my previous blog entry on Cinnamon Buns :)
Pics of different steps are included.

Thursday, October 8, 2009

Chicken Pie - A Pictorial Recipe

Inspired by the 'Step-by-Step' book, here's my pictorial recipe :P

Makes 5 Chicken Pies In a Bowl

Chicken Pie Filling


Ingredients:
300g chicken fillet, cut into cubes, marinade with some soya sauce & pepper
1 potatoe, peeled & cut into cubes
1 pink onion, diced
1 can of sliced mushrooms
1 can Campbell Soup
1 bowl of frozen mixed vegetables
(you can also include celery)


Heat 1 tbsp oil in wok. Add onion & fry till fragrant. Add some water, then the potatoes.
Cover wok and cook potatoes before adding chicken and all the other ingredients.
Add additional water & seasoning if necessary.
Set aside to cool & keep in the fridge until ready to use.


For the Shortcrust Pastry ('Pie Skin')

Ingredients:
240g flour
1/4 tsp salt
50g caster sugar
120g butter, cut into cubes & frozen
1 egg, beaten
2 tsp lemon juice
some ice-water


Sift flour into a bowl. Add sugar & salt. Mix well.
Add in the cold butter.


Use a butter/fat cutter or a fork to cut the butter into the flour...


... until the mixture resembles fine breadcrumbs.


Make a well in the centre of the flour mixture & pour in 1/2 the beaten egg.
Mix well with the fork & add in the remaining egg & lemon juice. Mix well.


Slowly add a little water at a time and mix well...

...until a dough is formed.

Wrap up the dough and let it rest in the fridge for 30 mins.
Now is a good time to wash up all the previous mess...

... and get ready to roll the dough.

Make the dough into small balls before rolling them using a rolling pin.
Slightly flour the work area and the rolling pin to prevent the dough from sticking.
Rotate the dough 90 degrees after every roll.
Press the rolled pastry into the bowl & trim off the excess over the edge of the bowl.


Baking Blinds (Optional) : This helps to give you a crispy base.
Line the pastry bowl with a piece of greaseproof paper.
Put soya beans/rice on top to prevent the pastry from rising during baking.
Bake for 15-20 mins in a pre-heat oven of 180degrees celcius.
You can re-use the beans for baking blinds again.
Allow them to cool before storage.

Allow the pastry to cool before adding the fridge cold filling.
Add a cooked quail's egg or quarter of an egg if desired.

Cover the pie with another piece of rolled-out dough.
Trim off the excess & seal the edges by pressing down with a fork.
Decorate as desired.
To glaze, brush a beaten egg.
Prick some holes with a fork to help release steam during baking.
This will help to give you a crispy crust.

Bake in the oven at 180 degrees for 30 minutes or until the crust has turned a golden brown.
Enjoy your pie hot :)
Storage: Let it cool before keeping in the fridge.
Before serving, put it into the oven & turned on the oven to 180 degrees and heat up for 30 mins.

Tuesday, September 29, 2009

Cinnamon Buns

Found the recipe from AllRecipes.Com. It was a 5* rating recipe with tonnes of positive reviews Reviews included "They're to die for", "Can't get enough of them.", etc... Yeah, you get the idea. So I tried the recipe in July but that was a failure as the buns ended up quite tough, not fluffy at all. My hubby said that I could kill with that :P Anyway, I tried the recipe again yesterday evening. And was really elated that the buns ended up quite nice & soft. Hubby gave me the thumbs up after devouring 2. My 1st sucessful bread making :) Definitely, going to bake more bread... :)

Hot & soft Cinnamon Bun.... Yummy...
Recipe for Cinnamon Buns
(makes 10-12)
Ingredients:
(A)
125ml warm milk (I used water instead)
50g sugar
5g dry active yeast
(B)
1 egg, room temperature
35g melted butter
(C) Sift
300g bread flour (high protein flour)
(D) Mix
40g melted butter
50g brown sugar
1/2 tsp ground cinnamon
chopped pecan nuts (optional)
Method:
1) Dissolve sugar in warm milk/water. Add the yeast. Let it stand for 10mins, or till yeast is foamy.
2) Add (B) & mix a little. Add flour. Use dough hooks of beater and mix well till dough ball is formed.
3) Heat oven to 100 degrees & switch off. Cover dough with a moist towel over the bowl.
Leave in oven for 1hr or till dough has doubled.
4) Roll dough flat. Trim into a rectangular piece. Spread (D) over dough and sprinkle chopped pecan nuts all over. (The trimmed off dough can make another 2-3 buns)
5) Roll up dough & cut into small pieces. Place rolls on greased pan, leaving space for expansion. Cover & let the dough rise for 30 mins, or double.
6) Bake at 200 degrees in pre-heat oven for 15 mins or till golden brown.
7) Enjoy your cinnamon buns hot & soft. To keep, let them cool & put in air-tight container & keep in the fridge. Just need to reheat before serving.
Enjoy!
Dough ball before rising...
1 hr later in a warm oven, dough has risen to more than double...

Roll dough, trim to rectangular shape.
Spread melted butter, brown sugar & ground cinnamon mixture all over.
Sprinkle chopped pecan nuts.
Roll it up.... & cut into pieces...

After rising in the baking pan, ready to be baked...

Traditional Sponge Cake

Found this recipe from Alex Goh's "Creative Making of Cakes". Tried it thrice, the first time was for making cupcakes. The cupcakes stayed soft even afterI put them into the fridge in Lock&Lock air-tight containers. (I tried another recipe I found from another book and baked another batch of cupcakes. They turned hard after I put them in the fridge.) So this recipe is going to stay :) The second time I used this recipe is to bake a swiss roll. But it didn't turn up well, I had an "Earthquake Roll" in the end. The third time I used the recipe was to bake a birthday cake for mum.


A nice golden baked vanilla sponge cake


A Fresh Fruits Birthday Cake for Mum

Recipe for Traditional Sponge Cake
For 1 9-inch round mould
( I used a 81/2" springform cake pan)

Ingredients:
(A)
5 eggs
150g caster sugar
(*Optional 1 tsp vanilla essense or other flavoured paste as desired)

(B) sift
120g flour (I used Top flour)

(C)
80g Melted butter

Method:
1) Whip (A) till light & fluffy.
2) Fold in flour till wel mixed.
3) Stir in melted butter untilwell incorporated.
4) Grease cake mould & pour batter into the cake mould.
5) Bake at 180 degrees celcius for 30-45 minutes.
(Cake has turned nice golden brown. Use skewer test- Poke skewer/toothpick through the middle of the cake. It should come out clean.) Remove cake from the mould immediately & cool on cooling rack.

1) Whip sugar & eggs.


2) Melt butter.


3) The sugar & eggs should be whipped till light & fluffy. Notice that colour has turned to pale ivory.

4) Fold in sifted flour into the mixture by writing the figure '8' using the spatula.

5) Stir in the melted butter & mix well. There is a tendency for the melted butter to sink to the bottom so make sure that you mix the mixture at the bottom well.

6) Pour the cake batter into a grease cake tin & baked in a pre-heat oven of 180 degrees celcius for 30 mins. The skewer should come out clean.


7) Remove the cake from the acke tim & cool on a cooling rack.

Cake is really nice & soft. For storage in the fridge, keep in a air-tight container, like a Lock & Lock, to retain the moisture of the cake. The cake was able to stay quite soft even when it was used to make an ice-cream cake.

* The batter can also be used to make cupcakes. Just reduce the baking time.

Monday, September 7, 2009

Dao Suan

Yesterday, went to the hawker centre for breakfast. Had soyabean milk with 'you char kweh'. Remembered that I had a packet of split green beans at home waiting to be cooked, so bought an extra 'you char kweh' to cook 'dao suan' this morning.


Dao Suan with You Char Kweh


Recipe for Dao Suan
(serves about 4 medium bowls or 8 small bowls)

Ingredients:
1 packet of split beans (these are actually green beans without skin), soaked overnight
1 litre of water
a piece of rock honey
sugar
pandan leaves (2 leaves for steaming dao suan, the rest to be tied in a bundle)
1 pair of you char kueh
sweet potato starch water (app. 200ml of water mixed with 8 tbps of sweet potato starch)

Method:
Cooking the beans:
1) Drain the split beans that's soaked overnight. Mix the beans with 1 tbsp of sugar. Cut 2 pandan leaves in halves and place them on a plate. Pour the beans over the pandan leaves.
Steam the beans for 20-30 mins or till cooked. Try some to make sure that they're soft enough.
Preparing the sauce:
2) In a pot, boil 1 litre of water. Switch off fire & put in the bundle of pandan leaves. Leave for 10 minutes to infuse the pandan flavour.
3) Remove the bundle of pandan leaves & add in a piece of rock honey. Add in more sugar if necessary. Make it slightly sweeter as more liquid will be added later.
4) Turn on small heat & slowly pour in the sweet potato starch water into the pot, stirring the 'soup' at the same time. This will ensure that the soup is smooth & not lumpy. Add more starch water as necessary to achieve the required thickness in the soup.
5) Once the soup is ready, turn off heat. Add in the steamed beans and mix well.
6) Serve hot with slices of you char kweh.

Thursday, August 6, 2009

Yummy Chicken Pie

Yesterday tried to make some chicken pies with shortcrust pastry. Had borrowed a book about pies from NLB & got the recipe for making the crust there. Really didn't know how the crust would turn out. Would it be soggy or too hard?

Turned out to be crispy & just nice, just like the chicken pie from Prima Deli. Hubby loved it so much that he robbed my share before I could finish it!

Here's the recipe to share. Do let me know if you've tried it out :)

Recipe for chicken Pies (Makes 4 4-inch/10cm round pie bowls)


Shortcrust Pastry:
Ingredients:
200g flour
1/2 tsp salt
2 tbsp icing/fine sugar
1 beaten egg
1 tsp lemon juice
100g butter (cut into small pieces & frozen)
some ice water


Method:
1. Sift flour into a medium size mixing bowl. Mix in the salt & sugar.
2. Put the frozen pieces of butter into the mixing bowl. (pic above)
3. Use a fork to cut in the butter into the flour. Avoid using hands to prevent butter from melting. Continue until mixture resembles small bread crumbs.
4. Make a well in the centre of the mixture & slowly pour in 1/2 of egg. Use fork to mix the mixture. Slowly add in the remaining egg and until there's enough liquid to form a dough. If it's still dry, add in tsp of ice water. Once a dough is formed, lightly knead it into a ball and wrap it using cling warp & put in fridge for at least 30 mins before rolling it out and laying on the pie pans.

Chicken Pie Filling
Ingredients:
1 tbsp of olive oil
1 big pink onion , diced
100ml of water
1 large potato, cut into small cubes
1 can of Campbell Soup (Cream of Mushroom)
300g of chicken meat, cut into small pieces
1 stalk of celery, cut into small pieces
a handful of frozen mixed vegetables (green bean, carrot & corn mix)
canned button mushrooms (cut into slices/ quartered)
pepper

Method:
1. Heat oil in wok and put in the onion. Fry till fragrant and pour in the water.
2. Put in the potatotes and let it boil before pouring in the campbell soup.
3. Mix well and put in the chicken meat.
4. Let it boil before putting in the celery, mixed vegetables & canned mushroom.
5. Simmer for 10-15 minutes.
6. Add pepper to taste.
7. Cool the chicken filling before putting onto pie tray lined with pastry. (Best if filling is fridge cold.)

Making the pie
1. Take out the fridge cold dough. Prepare work station to roll out the dough. Lightly flour your hands, the surface for rolling & the rolling pin.
2. Take a ball of dough (about the size of a golfball & roll out. Turning the dough 90 degrees, every 2 rolls. Roll till u get a thickness of roughly 3mm & enough to lay the pie bowl. Roll out 4 pieces. Lay the pie bowl with the rolled out dough, pressing the sides flat, leaving about 1cm extra over the edge of the bowl. Cut out the excess using a pair of scissors.
3. Roll out another 4 pieces that will cover the top of the pies, slightly bigger (about 1cm).
4. Scoop the cold chicken filling into the 4 pie bowls, then cover with pastry crust (3).
5. Fold in the edges of the top crust with the bowl crust. Use a fork to press down the sides all around to seal the pie & give it a nice edge.
6. Use a fork to poke holes on the top of the pies. This will release the steam from the filling when baking.
7. You can roll out the leftover dough and use a cookie cutter and cut into shapes to decorate the tops of the pies.
8. Brush the top with a beaten egg to give it a nice golden brown when baked.
9. Place pies on a preheat baking tray and bake in a preheat oven @180-200 degrees for 30minutes or until the top has turned a nice golden brown.
10. Let it rest for 5 mins & serve pies while hot. Yummy!
Storing Chicken Pies
Let the pies cool before putting them in a container, then into the fridge.
From the fridge, bake cold pies in a preheat oven of 180 degrees for 20 mins before serving.
Related Posts with Thumbnails